ArcGIS Field Maps allows you to capture asset inventories and observations in the field on maps enabled for editing. Each asset and observation you capture has both a location and a form. You'll provide the location and fill out the form.
Note:
If you're inspecting, updating, or editing existing assets or observations, see Inspect.
| Are you at the location of the asset or observation? | |
|---|---|
   | Capture an asset or observation you can be at, such as a hydrant, pipeline, or football field. This is useful when a length or area has straight sections. Use your location to define the ends of straight sections and Field Maps connects them. This is supported for single places, lengths, and areas. |
Capture at your location with GPS averaging  | Take multiple GPS readings and average the values to get a more precise location. This is common in high-accuracy workflows, such as capturing the location of an underground valve. This is supported for single places, lengths, and areas. |
Capture automatically while walking or driving the length or boundary (streaming) 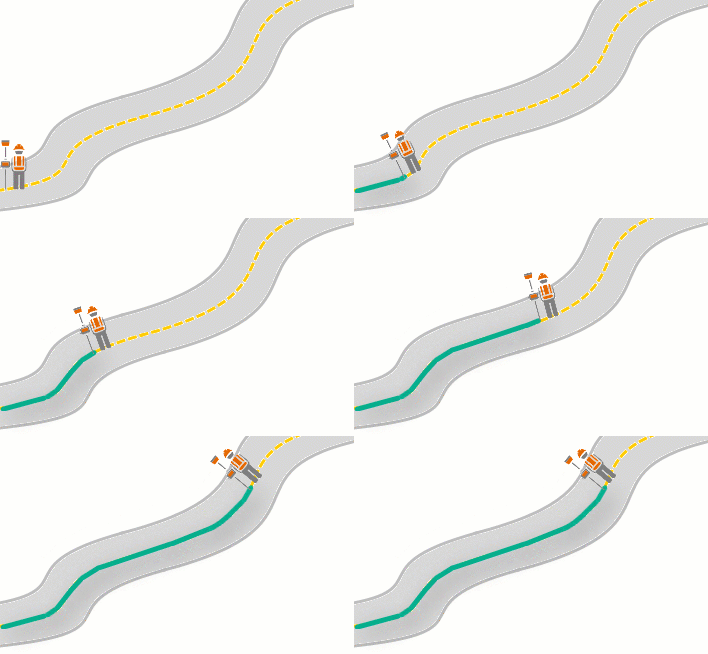 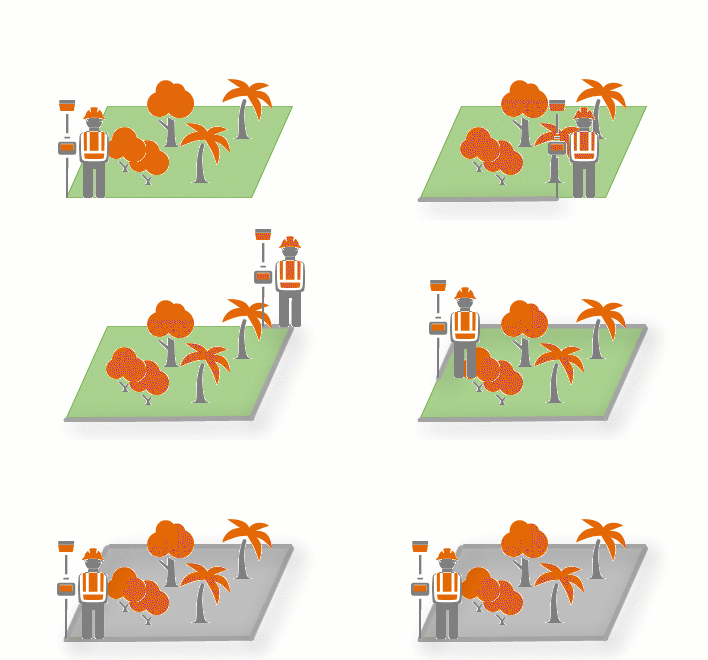 | Capture an asset or observation you can be at that is a smooth line or has a smooth boundary, such as a path or flower bed. Use your location as you walk or drive the length or boundary to create smooth sections matching the shape of the asset or observation. This is supported for lengths and areas. |
Copy an existing asset or observation to your location 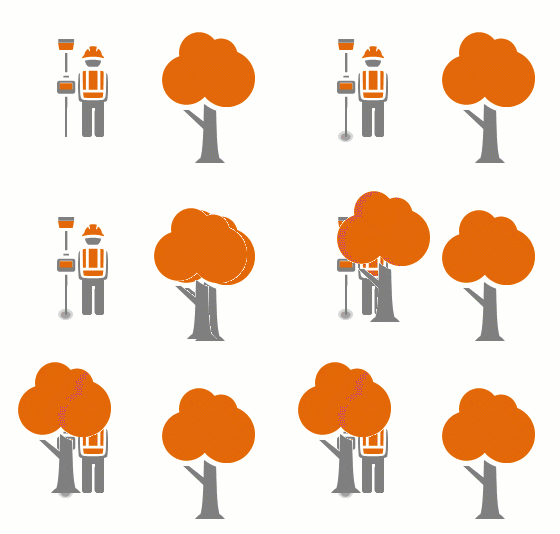 | Capture an asset or observation with the same form as an existing one—the form matches and can be updated. This is useful when capturing the same or similar things, such as a row of newly planted spruce trees. This is supported for single places, lengths, and areas. |
| Are you using the map to find the location? | |
|---|---|
Capture at a location chosen on the map  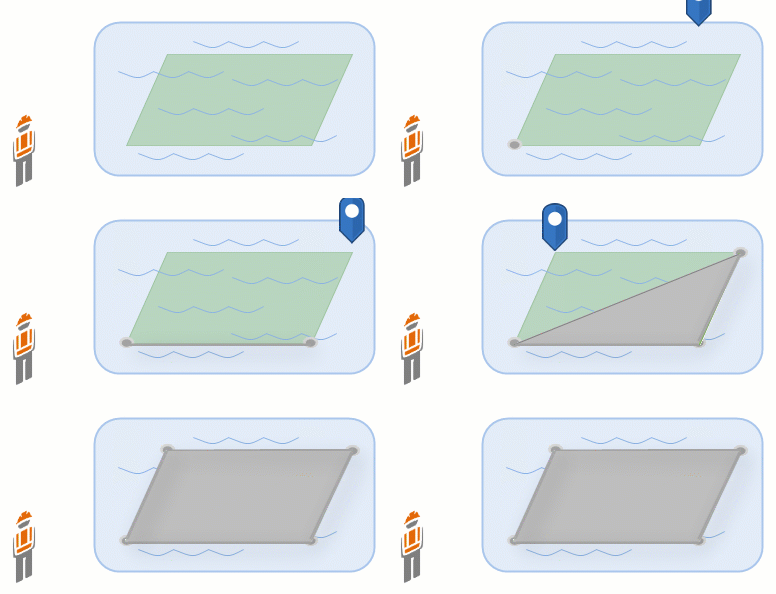 | Capture an asset or observation you can see but not be at, such as a damaged building when the location must be placed at the structure, or a flooded field. Use the map and its basemap or reference layers to place points. Lengths and areas use the points to define the ends of straight sections and Field Maps connects them. This is supported for single places, lengths, and areas. Tip:If you only need to measure a length or area and not create an item on the map, use the measure tool. |
| Do you have the coordinates of the asset or observation? | |
|---|---|
Capture at a coordinate location 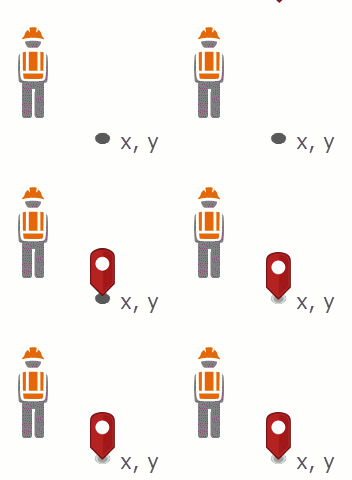 | Capture an asset or observation at known coordinates. Examples include a location communicated via radio during a search and rescue mission or weather observations from a handheld weather meter. This is supported for single places or the first point of a length or area. |
| Is the location the same as that of a point of interest? | |
|---|---|
Capture using a point of interest  | Capture at the same location as a point of interest, sharing the location, but getting a new, empty form. For example, search for an address to start capturing data. This is supported for single places or the first point of a length or area. |
| Are you copying an existing asset or observation? | |
|---|---|
Copy an existing asset or observation 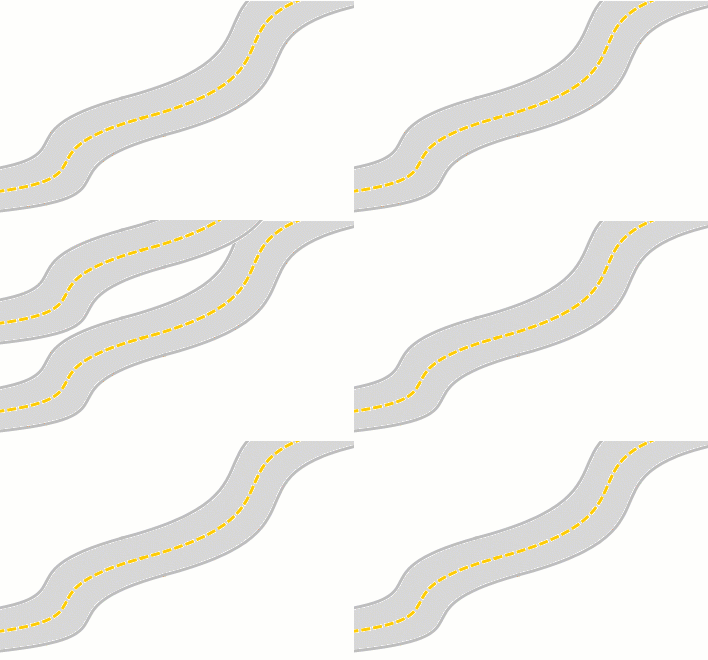 | Copy an existing asset or observation, sharing the location, shape, or form. For example, copy a road to use it for managing repaving. |
| Are you capturing an asset or observation that is related to an existing asset or observation? | |
|---|---|
Capture an asset or observation from the form of an existing related asset or observation 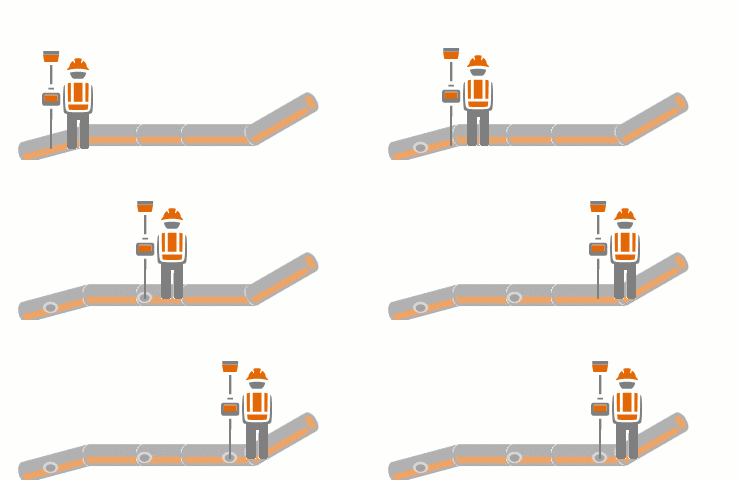 | Capture an asset or observation that is related to an existing asset or observation. You can use your location or choose a location on the map. For example, readings taken along a pipeline are often associated with the pipe, but have their own location along it. This is supported for single places, lengths, and areas. |
At your location
You are at the location of the asset or observation you want to capture. Use the GPS to capture its location.
- Open the map of your assets or observations.
- Tap Add
 .
.The location target appears on the map, centered on your location.
- Choose the type of asset or observation to capture.
Note:
If you're not prompted to choose, you only have a single type available, and it is selected automatically.
The asset or observation (or its first point, if it's a length or area) is placed on the map at your location (assuming your GPS accuracy is within the limits you've set), marked by the location target. If the circle of the location target is red, your location accuracy isn't good enough (based on your required accuracy setting), and you must override the accuracy by tapping Add point, manually place the point, or wait for better accuracy. Once placed, the point doesn't move as your GPS location updates.
- If you need to update the location, you can do so either using the GPS or manually.
- To manually set the location, move the map so that your desired location is under the location target.
- To use the GPS, tap the GPS button
 and the location target is centered on your location.
Tap Update point (Update selected point from the Overflow menu
 for lengths and areas) and the point moves to the current position of the location target.
 - If you're capturing a length or area, move to the next place you want to add a point (the location target follows you) and tap Add point. Repeat until your asset or observation's location is complete.
Tip:
You can manually place a point on the map by moving the map so that your desired location is under the location target and tapping Add point. To center the location target over your location again, tap the GPS button
 .
.You can also stream sections of the asset, if desired. Use Start streaming (in the Overflow menu
 ) to create a section of the asset by traveling along it. Tap Stop streaming to continue to place points without streaming. See At your location while traveling (streaming).
 - Fill out the form, including adding any attachments (photos or videos).
- Tap Submit
 once your asset or observation is ready.
Your asset or observation is on the map and its form displays in the panel. If you're working online, others immediately have access to your edits. If you're working offline, your edits are available to others once you sync them.
At your location with GPS averaging
You are at the location of the asset or observation you want to capture. Capture multiple GPS points and average them to capture its location.
- Enable GPS averaging in the settings in Field Maps.
- Open the map of your assets or observations.
- Tap Add
 .
.The location target appears on the map, centered on your location.
- Choose the type of asset or observation to capture.
Note:
If you're not prompted to choose, you only have a single type available, and it is selected automatically.
GPS averaging begins, and once the required number of locations are captured, the asset or observation (or its first point, if it's a length or area) is placed at the averaged location on the map.
- If you need to update the location, tap Start averaging (for single places) or Update selected point (in the Overflow menu
 for lengths and areas) to redo the GPS averaging and calculate a new location.
 Tip:
If you pan away from your GPS location, you can tap Update point (Add point for lengths and areas) and tap Use target location to add a point at that location on the map. To use GPS averaging instead, tap Update point (Add point for lengths and areas) and tap Start averaging.
- If you're capturing a length or area, move to the next place you want to add a point (the location target follows you) and tap Add point. Repeat until your asset or observation's location is complete. An average is calculated when placing each point.
Tip:
You can also stream sections of the asset, if desired. Use Start streaming (in the Overflow menu
 ) to create a section of the asset by traveling along it. Tap Stop streaming to continue to place points without streaming. See At your location while traveling (streaming).
 - Fill out the form, including adding any attachments (photos or videos).
- Tap Submit
 once your asset or observation is ready.
Your asset or observation is on the map and its form displays in the panel. If you're working online, others immediately have access to your edits. If you're working offline, your edits are available to others once you sync them.
At your location while traveling (streaming)
Walk or drive along the asset or observation you are capturing and create its geometry based on your path. By automatically adding points based on the time or distance since the last point was added, you create the location by traveling along it instead of adding each point manually. This involves less hands-on interaction, but it can also result in less-accurate locations (for example, when rounding corners).
Note:
Streaming to collect lengths and areas and GPS averaging are mutually exclusive: you can't average values and stream at the same time.
- Open the map of your assets or observations.
- Tap Add
 .
.The location target appears on the map, centered on your location.
- Choose the type of asset or observation to capture.
Note:
If you're not prompted to choose, you only have a single type available, and it is selected automatically.
The first point is added to the location of the asset or observation at your location (assuming your GPS accuracy is within the limits you've set), marked by the location target. If the circle of the location target is red, your location accuracy isn't good enough (based on your required accuracy setting), and you must override the accuracy by tapping Add point, manually place the point, or wait for better accuracy. Once placed, the point doesn't move as your GPS location updates.
- From the Overflow menu
 , tap Start streaming.
The location target is removed from the map and the blue GPS dot appears. The first streamed point is placed on the map at your current location (assuming your GPS accuracy is within the limits you set).
- Walk or drive along or around the asset or observation.
As your GPS location updates, additional points are added to the location. The frequency at which they are added depends on the streaming settings.
While you are streaming, you can't manually add or update points. To do this, stop streaming, make your updates, and start streaming again.
- Fill out the form, including adding any attachments (photos or videos).
- When you finish traveling the asset or observation, tap Stop streaming.
- Tap Submit
 once your asset or observation is ready.
Your asset or observation is on the map and its form displays in the panel. If you're working online, others immediately have access to your edits. If you're working offline, your edits are available to others once you sync them.
At your location with a duplicated form
Copy an existing asset or observation's form to a new asset or observation at your location. This is useful when capturing similar assets or observations.
- Open the map of your assets or observations.
- Select the asset or observation you want to copy by doing one of the following:
- Tap the asset or observation on the map to select it manually.
- Do a search for the asset or observation, and choose it from the search results.
- From a pin dropped at its location, go to What's here and choose the asset or observation from the list.
If there is more than one asset or observation at that location, choose the one to update from the list that appears.
The asset or observation is highlighted on the map and its form displays in the panel.
- Tap Copy
 .
.Note:
If the asset or observation is read-only, this copies the form and location.
The asset or observation (or its first point, if it's a length or area) is placed on the map at your location (assuming your GPS accuracy is within the limits you've set), marked by the location target. If the circle of the location target is red, your location accuracy isn't good enough (based on your required accuracy setting), and you must override the accuracy by tapping Add point, manually place the point, or wait for better accuracy. Once placed, the point doesn't move as your GPS location updates.
The type of asset or observation and its form are populated to match those you are copying.
- If you need to update the location, you can do so either using the GPS or manually.
- To manually set the location, move the map so that your desired location is under the location target.
- To use the GPS, tap the GPS button
 and the location target is centered on your location.
Tap Update point (Update selected point from the Overflow menu
 for lengths and areas) and the point moves to the current position of the location target.
 - If you're capturing a length or area, continue providing the location. You can use your location to add individual points, add multiple points based on your location while traveling (streaming), place individual points on the map, or do a combination of the three. Continue adding points until your asset or observation's location is complete.
- Use your location to add individual points—Move to the next place you want to add a point (the location target follows you) and tap Add point. If you are doing GPS averaging, an average is calculated when placing each point.
- Use your location while traveling (streaming)—From the Overflow menu
 , tap Start streaming. Walk or drive along or around the asset or observation and points are automatically added to the location. The frequency at which they are added depends on the streaming settings.
 - Place individual points on the map—Move the map so that the next place you want to add a point is under the location target and tap Add point.
Tip:
You can use the location of an existing point (including one that is part of a length or area). Move the map so that the point with the location you need to use is near the location target such that an orange dot appears over the existing point, and lift your finger from the map. The location target moves (snaps) to the existing point.
- Update the form, including adding any attachments (photos or videos).
- Tap Submit
 once your asset or observation is ready.
Your asset or observation is on the map and its form displays in the panel. If you're working online, others immediately have access to your edits. If you're working offline, your edits are available to others once you sync them.
At a location chosen on the map
Use the map to specify its location. Perhaps you can't get to the location of your asset or observation, or it would be dangerous to do so.
- Open the map of your assets or observations.
- Long press on the map at the location of the asset or observation you want to capture.
A pin is dropped on the map and its form displays in the panel. Tap Details if not already viewing them.
- Tap Collect here.
The location target appears on the map at the pin's location.
- Choose the type of asset or observation to capture.
Note:
If you're not prompted to choose, you only have a single type available, and it is selected automatically.
It (or its first point, if it's a length or area) is placed on the map under the location target.
- If you need to update the location, move the map so that the desired location is under the location target and tap Update point (Update selected point from the Overflow menu
 for lengths and areas).
Tip:
You can use the location of an existing point (including one that is part of a length or area). Move the map so that the point with the location you need to use is near the location target such that an orange dot appears over the existing point, and lift your finger from the map. The location target moves (snaps) to the existing point.
- If it's a length or area, provide the next point by moving the map so that the next place you want to add a point is under the location target and tap Add point. Continue adding points until your asset or observation's location is complete.
- Fill out the form, including adding any attachments (photos or videos).
- Tap Submit
 once your asset or observation is ready.
Your asset or observation is on the map and its form displays in the panel. If you're working online, others immediately have access to your edits. If you're working offline, your edits are available to others once you sync them.
At specific coordinates
Use Search to find a location and capture an asset or observation at that location. Perhaps coordinates were provided to you, or you know the exact location of your asset or where the observation is made.
- Open the map of your assets or observations.
- Tap Search
 , enter the coordinates where you want to place the asset or observation, and tap Search. If there are multiple search results, tap the search result matching your coordinates.
Coordinates can be entered in the following formats:
Format Example Notes Decimal degrees (DD)
34.057814 -117.196475
34.057814N 117.196475W
Specify latitude and then longitude.
Degrees decimal minutes (DDM)
34 3.47N 117 11.79W
Specify latitude and then longitude.
Degrees minutes seconds (DMS)
34 3 28N 117 11 47W
Specify latitude and then longitude.
Military Grid Reference System (MGRS)
11S MT 81868 68583
United States National Grid (USNG)
11S MT 81868 68583
Universal Transverse Mercator (UTM)
11S 481868 3768583
A search pin is dropped on the map and its form appears in the panel.
- Tap Collect here.
The location target appears on the map at the pin's location.
- Choose the type of asset or observation to capture.
Note:
If you're not prompted to choose, you only have a single type available, and it is selected automatically.
It (or its first point, if it's a length or area) is placed on the map under the location target.
- Fill out the form, including adding any attachments (photos or videos).
- Tap Submit
 once your asset or observation is ready.
Your asset or observation is on the map and its form displays in the panel. If you're working online, others immediately have access to your edits. If you're working offline, your edits are available to others once you sync them.
At a point of interest
Use a point of interest on the map as the location for a new asset or observation. You can search for a new point of interest on the map or use a saved location from My places.
- Open the map of your assets or observations.
- Select the point of interest by doing one of the following:
- Tap Search
 , enter the place or address where you want to place the asset or observation, and tap Search. If there are multiple search results, tap the search result matching your desired location.
 - Tap Overflow
 and then tap Bookmarks. Tap My places and select the point of interest where you want to place the asset or observation.
- Tap Search
- Tap Collect here.
The location target appears on the map at the pin's location.
- Choose the type of asset or observation to capture.
Note:
If you're not prompted to choose, you only have a single type available, and it is selected automatically.It's placed on the map under the location target.
- Fill out the form, including adding any attachments (photos or videos).
- Tap Submit
 once your asset or observation is ready.
Your asset or observation is on the map and its form displays in the panel. If you're working online, others immediately have access to your edits. If you're working offline, your edits are available to others once you sync them.
By copying an existing asset or observation
Copy the form, shape, and location of an existing asset or observation. This allows you to create a copy with a different type or in a different layer, but retain the location, shape, and any matching attributes.
Tip:
If you need to use part of the location of an existing asset or observation to define the location of a new (or updated) asset or observation, consider snapping instead of copying the entire location as shown in these steps. To snap, start capturing your asset or observation based on any of the workflows in this topic. While providing its location, use the location of an existing point (including one that is part of a length or area) by moving the map so the point with the location you need to use is near the location target and an orange dot appears over the existing point, and lift your finger from the map. The location target moves (snaps) to the existing point. Snapping must be enabled to do this.
- Open the map of your assets or observations.
- Select the asset or observation you want to copy by doing one of the following:
- Tap the asset or observation on the map to select it manually.
- Do a search for the asset or observation, and choose it from the search results.
- From a pin dropped at its location, go to What's here and choose the asset or observation from the list.
If there is more than one asset or observation at that location, choose the one to update from the list that appears.
The asset or observation is highlighted on the map and its form displays in the panel.
- Tap Copy
 . Depending on the copy settings configured in the Field Maps web app, you can choose from the following options:
- Copy attributes—Copy the feature's attributes to a new feature.
- Copy shape—Copy the feature's shape to a new feature.
- Copy all—Copy the feature's attributes and shape to a new feature.
- Choose the type of asset or observation to capture.
The types you can choose are limited to those of the same geometry type (for example, length or area) as the feature you are copying.
Note:
If you're not prompted to choose, you only have a single type available, and it is selected automatically.
The form and location are copied and displayed. Entries in the new form that have the same name and type as entries in the copied form are populated to match the copied form.
- Edit the location as needed.
This doesn't affect the location of the original, copied asset or observation.
- Fill out the form, including adding any attachments (photos or videos).
- Tap Submit
 once your asset or observation is ready.
Your asset or observation is on the map and its form displays in the panel. If you're working online, others immediately have access to your edits. If you're working offline, your edits are available to others once you sync them.
Related to another asset or observation
Use the form of an existing asset or observation to capture a related asset or observation.
Note:
If you're collecting a related inspection or other nonspatial form, see the Add a related report inspection workflow.
- Open the map of your assets or observations.
- Select the asset or observation to which you're adding related information by doing one of the following:
- Tap the asset or observation on the map to select it manually.
- Do a search for the asset or observation, and choose it from the search results.
- From a pin dropped at its location, go to What's here and choose the asset or observation from the list.
If there the is more than one asset or observation at that location, choose the one to update from the list that appears.
The asset or observation is highlighted on the map and its form appears in the panel.
- In the form, scroll to the Related section. Tap the layer to which you are adding an asset or observation.
A list of existing forms appears if there are any.
- Tap Add to add a new asset or observation.
- Choose the type of asset or observation to capture.
Note:
If you're not prompted to choose, you only have a single type available, and it is selected automatically.
The asset or observation (or its first point, if it's a length or area) is placed on the map at your location (assuming your GPS accuracy is within the limits you've set), marked by the location target. If the circle of the location target is red, your location accuracy isn't good enough (based on your required accuracy setting), and you must override the accuracy by tapping Add point, manually place the point, or wait for better accuracy. Once placed, the point doesn't move as your GPS location updates.
- If you need to update the location, you can do so either using the GPS or manually.
- To manually set the location, move the map so that your desired location is under the location target.
- To use the GPS, tap the GPS button
 and the location target is centered on your location.
Tap Update point (Update selected point from the Overflow menu
 for lengths and areas) and the point moves to the current position of the location target.
 - If you're capturing a length or area, continue providing the location. You can use your location to add individual points, add multiple points based on your location while traveling (streaming), place individual points on the map, or do a combination of the three. Continue adding points until your asset or observation's location is complete.
- Use your location to add individual points—Move to the next place you want to add a point (the location target follows you) and tap Add point. If you are doing GPS averaging, an average is calculated when placing each point.
- Use your location while traveling (streaming)—From the Overflow menu
 , tap Start streaming. Walk or drive along or around the asset or observation and points are automatically added to the location. The frequency at which they are added depends on the streaming settings.
 - Place individual points on the map—Move the map so that the next place you want to add a point is under the location target and tap Add point.
Tip:
You can use the location of an existing point (including one that is part of a length or area). Move the map so that the point with the location you need to use is near the location target such that an orange dot appears over the existing point, and lift your finger from the map. The location target moves (snaps) to the existing point.
- Fill out the form, including adding any attachments (photos or videos).
- Tap Submit
 once your related form is ready.
The form of the existing asset or observation is updated to reference the new form and the new form displays in the panel. The new form's location shows on the map. If you're working online, others immediately have access to your edits. If you're working offline, your edits are available to others once you sync them.
Tips
Tips to help you get the most out of your data collection are listed below.
Improve your GPS reception
To improve your GPS reception, make sure you have a clear view of the sky. Avoid tree canopy, and move away from tall buildings. GPS accuracy is displayed in the GPS banner. Tap the GPS banner to get GPS details, including the provider.
Edit location
The location of a single place is a point and the location of a length or an area is defined by a series of points. Locations are edited by adding, updating, and deleting the points.
- A single point is added when you tap Add point. It is placed under the location target. You can position the location target over your location by tapping the GPS button
 or position it manually by moving the map.
If the GPS button doesn't display, the map is already centered over your location and the location target moves with you. If the GPS meets the required accuracy, the circle of the location target is blue, as is the text in the GPS banner. Otherwise, the circle and text are red. If the location target isn't centered over your location, the GPS button displays, the circle of the location target is gray, and the text in the GPS banner is gray.
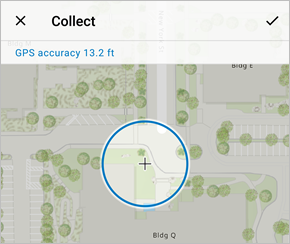
Good GPS accuracy 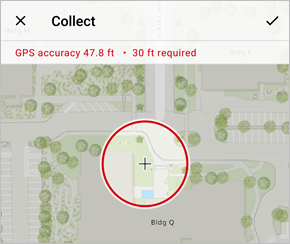
Inadequate GPS accuracy 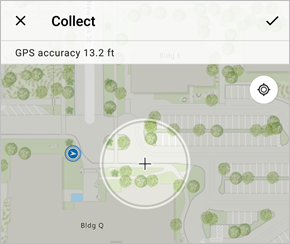
Place a point without GPS If you're placing the point using the GPS and the GPS doesn't meet the required accuracy, you are notified. You can choose to ignore the accuracy requirement and place the point anyway.
If you are performing GPS averaging, an average is calculated when placing each point using the GPS.
Before the point is added to a length or area, dotted lines show a preview of the location with a point added under the location target.
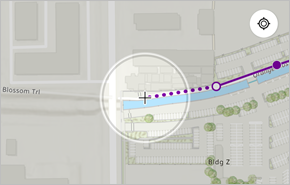
Dots preview the location - While editing a length or area, the location has a selected point (with a white fill). By default, the last point added is selected. Tap a point to select it.
- Points added to the location of a length or area are added following the selected point.
- Multiple points can be added to a length or area automatically through streaming, following as you move and creating smooth shapes, by tapping Start Streaming in the Overflow menu
 .
.The location target is removed from the map and the blue GPS dot appears. The first streamed point is placed on the map at your current location (assuming your GPS accuracy is within the limits you've set). Walk or drive the asset or observation. As your GPS location updates, points are added to the location. To manually add or update a point, stop streaming, make your updates, and start streaming again.
The frequency at which points are added depends on your settings. If you want the points spaced a minimum distance apart, base the streaming on distance and specify a distance. If you want points added at a minimum time frequency, base the streaming on time and specify a time interval.
- Move the selected point by positioning the location target over the new place and tapping Update point (for single places) or Update selected point in the Overflow menu
 (for lengths and areas).
 - Remove the selected point of a length or area by tapping Delete selected point in the Overflow menu
 .
. - Undo location edits by tapping Undo, or redo them by tapping Redo, in the Overflow menu
 .
.
Capture locations with altitude
You can directly capture 3D assets and observations to use throughout ArcGIS. If your layer is z-aware, points captured in Field Maps include z-values (altitude information).
Note:
Capturing assets and observations into a z-aware layer requires a z-value. If you are capturing at your location and your location is being provided through Wi-Fi, a z-value is not included, and you are not able to add the point.